For years, my sweet rescue dog Max would tremble and cry at the mere sight of nail clippers, leaving my hands scratched and my heart completely broken. I spent countless stressful afternoons searching for the best way to hold a dog to trim nails without causing a terrifying panic attack. It was only when I combined professional low-stress restraint techniques with a whisper-quiet, pain-free nail grinder that our weekly paw care nightmare transformed into a peaceful, rewarding bonding routine.
Maxpro 3-in-1 Grinder.
Stress-Free Nail Trimming.
Whisper-quiet DC motor (<40 dB) eliminates fear & discomfort. Features 3 ports, dual speeds, and 7-hour battery life. Safe, precise, and painless.
In This Article
- Step-by-Step Restraint Tutorial: Learn the safest holds to secure your dog without causing fear or resistance.
- Canine Paw Anatomy: Understand the sensitive quick to avoid painful injuries and bleeding.
- Size-Specific Positions: Tailored holding techniques for both fragile toy breeds and powerful large dogs.
- Stress-Free Behavioral Tips: Discover how to desensitize your dog and make nail trimming a calm, positive experience.
How to Hold Your Dog to Trim Nails: A Step-by-Step Guide to Restraint-Free Grooming
Before you begin the physical holding process, gather all necessary tools and ensure your dog is in a quiet, distraction-free room.
You will need high-value treats like freeze-dried liver, a reliable nail care tool, and a non-slip grooming mat to prevent your dog from sliding.
By preparing your space and tools beforehand, you eliminate frantic movements that can startle an already nervous pet.
Step 1: Choose a Comfortable Level Surface
Place your dog on a non-slip surface like a rubber mat, low table, or carpeted floor.
Never attempt to trim nails while your dog is struggling on a slick hardwood or tile floor.
Slipping triggers a survival fear response, which causes your dog to immediately tense up and pull away.
For smaller dogs, an elevated table helps bring them to your eye level, reducing strain on your back.
For large dogs, working directly on the floor is the safest option to prevent accidental falls.
Step 2: Position Your Body in a Gentle Side-Hug
Position yourself alongside your dog, facing the same direction to establish a neutral, non-threatening posture.
Drape your arm gently over your dog’s back to restrict sudden vertical jumps without applying crushing downward pressure.
This side-hug position naturally leverages your body weight to keep the dog steady and secure.
Keep your movements slow, fluid, and predictable to maintain a low-heart-rate environment.
If your dog starts to wiggle, simply maintain a firm, constant contact rather than squeezing harder.
Step 3: Secure the Leg Using the Natural Pivot Grip
Gently slide your hand down your dog’s leg, moving with the natural joint rather than pulling it outward.
Keep the leg tucked close to their body to prevent shoulder or hip joint hyperextension.
Many dogs struggle because owners pull limbs out to the side at uncomfortable, unnatural angles.
Support the elbow for front legs, or the hock for back legs, to keep the limb completely stable.
Speak in soft, low-frequency tones to reassure your dog that they are entirely safe in this hold.
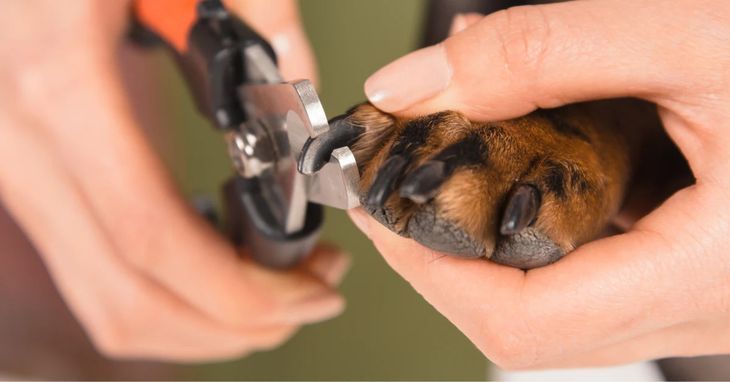
Step 4: Isolate the Target Toe with Your Thumb and Forefinger
Hold the paw firmly but gently, placing your thumb on top of the toe and your forefinger underneath the paw pad.
Apply a slight, steady squeezing pressure to extend the nail forward and push back any surrounding fur.
This isolating grip gives you absolute control over the single nail you are actively trimming.
If your dog pulls back, do not fight the movement; instead, let the leg move with your hand still gently attached.
Isolating the toe prevents accidental nicks to neighboring pads or skin if your dog makes a sudden movement.
Step 5: Trim the Nail at a Safe, Progressive Angle
Begin trimming the nail in tiny, paper-thin increments rather than attempting to take off a large chunk at once.
Use your chosen tool to smooth down the edges, keeping a close eye on the center of the nail bed.
Stop immediately when you see a pale pink circle (on light nails) or a dark, moist spot (on dark nails).
Reward your dog with a high-value treat after finishing each toe to build a powerful positive association.
Take frequent breaks between paws if you notice your dog’s breathing becomes heavy or shallow.
Enhancing Your Restraint Technique with Professional Tools
Using the proper physical holds is only half the battle when learning how to hold a dog for nail clipping.
If you pair a secure, gentle hold with loud, vibrating clippers, your dog will still struggle to escape the terrifying noise.
Our team at Zenpaw designed the Zenpaw Maxpro 3-in-1 Grinder specifically to complement low-stress physical restraint techniques.
Its whisper-quiet motor operates under 40 decibels, preventing the auditory triggers that cause dogs to pull their paws away.
By combining a gentle side-hug hold with our smooth, low-vibration grinder, you can effortlessly file down sharp tips without triggering a stressful flight response.
Experience the difference yourself by upgrading your grooming toolkit risk-free at the Zenpaw Maxpro 3-in-1 Grinder Product Page today.
99-Day 100% Money-Back Guarantee
“Ever since we started using the Zenpaw Maxpro Grinder, it’s been such a peaceful experience. It’s very quiet, and my dog actually relaxes. It’s turned our stressful sessions into quick, quiet grooming times.”
— Sarah M. | ✔ Verified Customer
- ✓ Prevents Infection & Splitting
- ✓ Ideal for All Dog Sizes
- ✓ Low-Vibration Technology
- ✓ Fast 2-7 Days Delivery
Need Support? Call 302-307-1000
Understanding Canine Paw Anatomy and Size-Specific Holds
To safely manage your dog’s paws, you must first master the delicate balance of canine anatomy.
A dog’s claw consists of a hard outer shell made of keratin and an inner living core called the quick.
The quick contains highly sensitive nerve endings and microscopic blood vessels that bleed easily if punctured.
When studying what direction to cut dog nails, keeping your cuts parallel to the natural slope of the paw is essential.
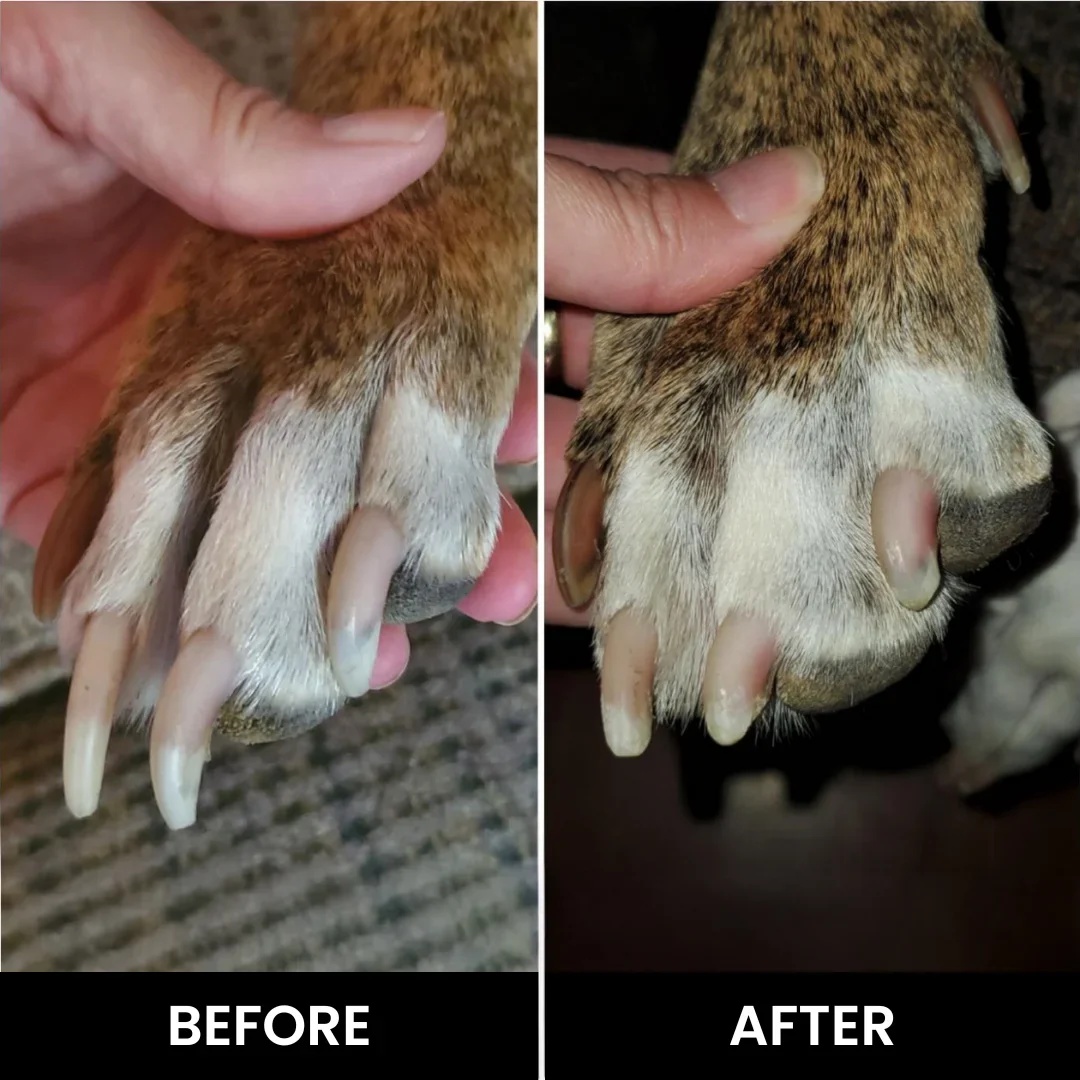
Overgrown nails can permanently alter your dog’s posture, shifting their body weight onto their delicate hind joints.
While some owners wonder, can dogs file their own nails, natural wear on asphalt is rarely enough to keep the quick from growing too long.
This is why regular physical maintenance is vital for preventing skeletal complications and painful splayed toes.
How to Hold a Small Dog for a Nail Trim
Working with toy and small breeds requires extra caution to protect their delicate skeletal structure.
The best way to hold a small dog to trim nails is the secure, warm lap wrap technique.
Wrap your small dog loosely in a soft, thick towel, leaving only one target paw exposed at a time.
This “purrito” style wrap keeps their tiny limbs secure while preventing them from squirming out of your lap.
Sit comfortably on the floor and place the wrapped dog gently in your lap, supporting their entire spine.
Never pull their front legs forward; instead, gently press the paw pads back toward the rear to keep joints natural.
This towel-wrap method creates a cozy swaddling effect that lowers their heart rate and keeps them secure.
Proper Hold on a Big Dog for Nail Clipping
Managing a large, uncooperative dog requires smart body leverage rather than brute physical force.
Attempting to wrestle a sixty-pound dog will only result in mutual frustration and potential injuries.
For large breeds, the proper hold on big dog for nail clipping is the gentle floor side-hug technique.
Have your dog lie down comfortably on their side on a soft, padded rug or thick orthopedic bed.
Position your body gently behind their spine, leaning your chest slightly over their torso to keep them grounded.
Use your forearm to keep their head gently resting on the floor, preventing them from sitting up suddenly.
This side-lying position relaxes their muscles, making it much easier to access both front and rear paws.
The Physiology of Canine Resistance: The Restraint Paradox
Many dog owners struggle because they fall victim to the traditional “restraint paradox.”
The tighter you grip your dog’s limbs, the more violently their biological survival instinct tells them to fight back.
This reaction is a natural defense reflex triggered when a dog feels trapped, helpless, or physically cornered.
Professional groomers use passive restraint, applying pressure only when the dog makes a sudden movement.
As soon as the dog relaxes, the groomer relaxes their grip, teaching the dog that calm behavior earns physical freedom.
Understanding this biological feedback loop is the absolute secret to reducing struggles during home grooming sessions.
How to Desensitize Your Dog and Use a 45-Degree Grinding Angle
To ensure a completely stress-free experience, you must systematically train your dog to accept paw handling.
This training method relies on classical counter-conditioning, turning a scary event into a fun, reward-earning game.
By slowly introducing your grooming tools, you build lifelong trust and cooperation with your canine companion.
Introducing Your Dog to the Grinder
Never rush into your dog’s space with an active grinder on the very first day of training.
Start by letting your dog sniff the turned-off grinder, rewarding their curiosity with a high-value treat.
Once they are comfortable with the physical tool, turn it on in the same room without touching their paws.
Feed them delicious treats while the whisper-quiet motor runs to associate the hum with good things.
Gradually move the vibrating handle closer to their shoulder, gently touching their skin with the non-spinning base.
This systematic desensitization teaches your dog that the device is completely harmless and leads to rewards.
Mastering the 45-Degree Grinding Angle
When you are ready to file, hold the grinder steady at a precise 45-degree angle relative to the nail’s growth.
This specific angle naturally matches the anatomical slope of the quick, ensuring you do not grind too deep.
Use light, pulsing touches of two to three seconds per nail to prevent friction heat from building up.
Grinding in quick, gentle pulses prevents the internal nerves from feeling any uncomfortable heat sensations.
Work from the bottom of the nail tip upward, smoothing out any sharp edges or splinters with ease.
| Holding Position | Best For | Key Advantage |
|---|---|---|
| Lap Wrap swaddle | Anxious, small, or fragile toy breeds | Prevents sudden wriggling and protects tiny leg joints |
| Floor Side-Hug | Large, powerful, or hyperactive dogs | Uses safe body leverage to ground the dog comfortably |
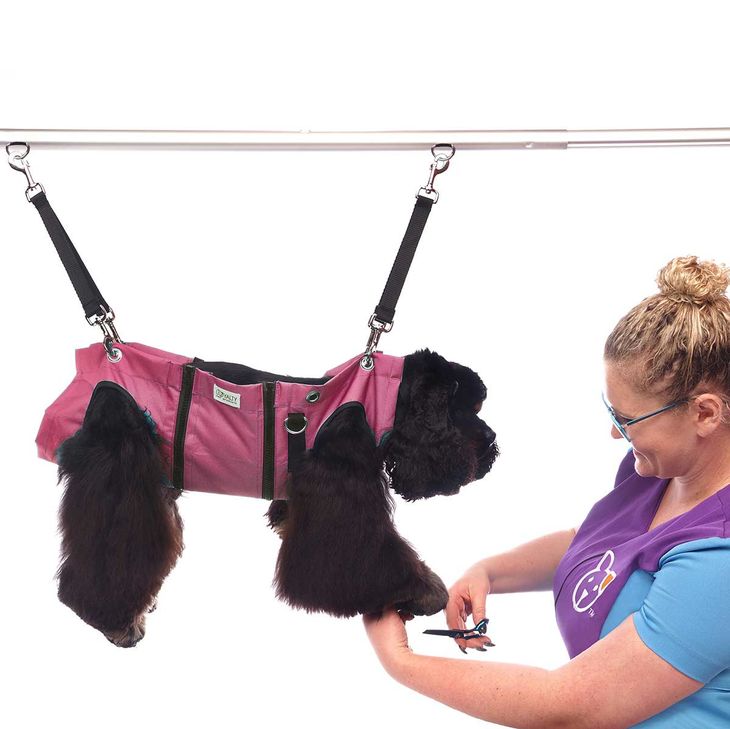
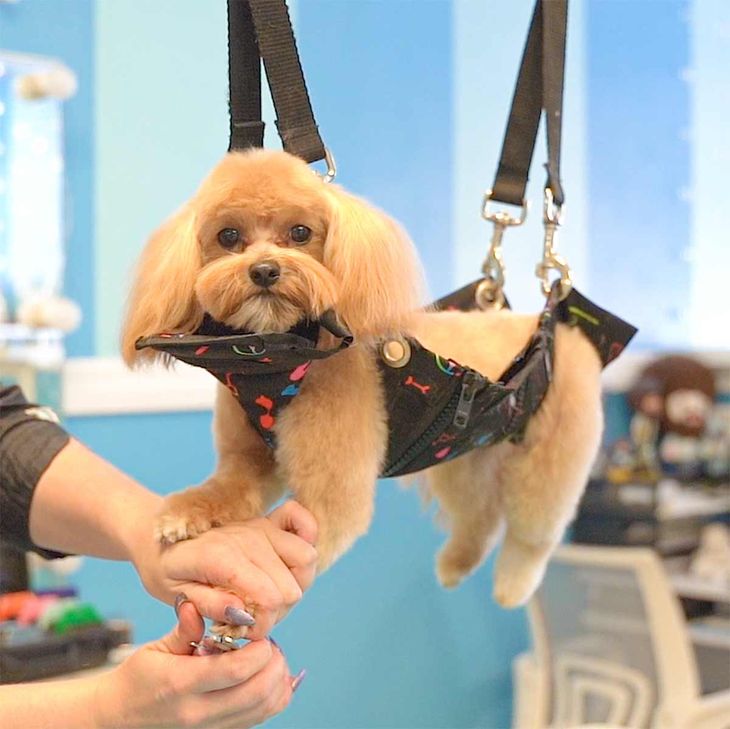
| Grooming Hammock | Extremely defensive dogs that kick out | Removes weight from paws, reducing the instinct to pull away |
How to Avoid Cutting the Quick and Managing Emergency Bleeding
Using traditional, dull steel clippers is one of the most common mistakes home groomers make.
Traditional clippers violently crush the sensitive nail, causing micro-fractures along the entire nail shaft.
This crushing pressure hurts your dog even if you manage to avoid cutting the live tissue inside.
If you cut too deep, you run a high risk of exposing the inner tissues to dirt and bacteria.
An uncovered wound can easily lead to a painful cut dog nail too short infection, requiring expensive vet care.
If an accidental cut occurs, immediately apply a generous pinch of dog nail bleeding powder directly to the tip.
If you do not have styptic powder at home, you can use a damp bar of soap to stop dog nail bleeding in a pinch.
Press the claw firmly into the bar of soap for thirty seconds to form a safe, sterile plug.
To completely avoid these painful accidents, switching to a high-precision rotary grinder is the safest choice.
A grinder allows you to file down nails in microscopic layers, giving you full control over the process.
Frequently Asked Questions About Dog Nail Trimming Holds
Is the Zenpaw Grinder powerful enough for large dog breeds?
Yes, the Zenpaw Maxpro Grinder features an upgraded, high-torque motor designed to handle the thickest nails.
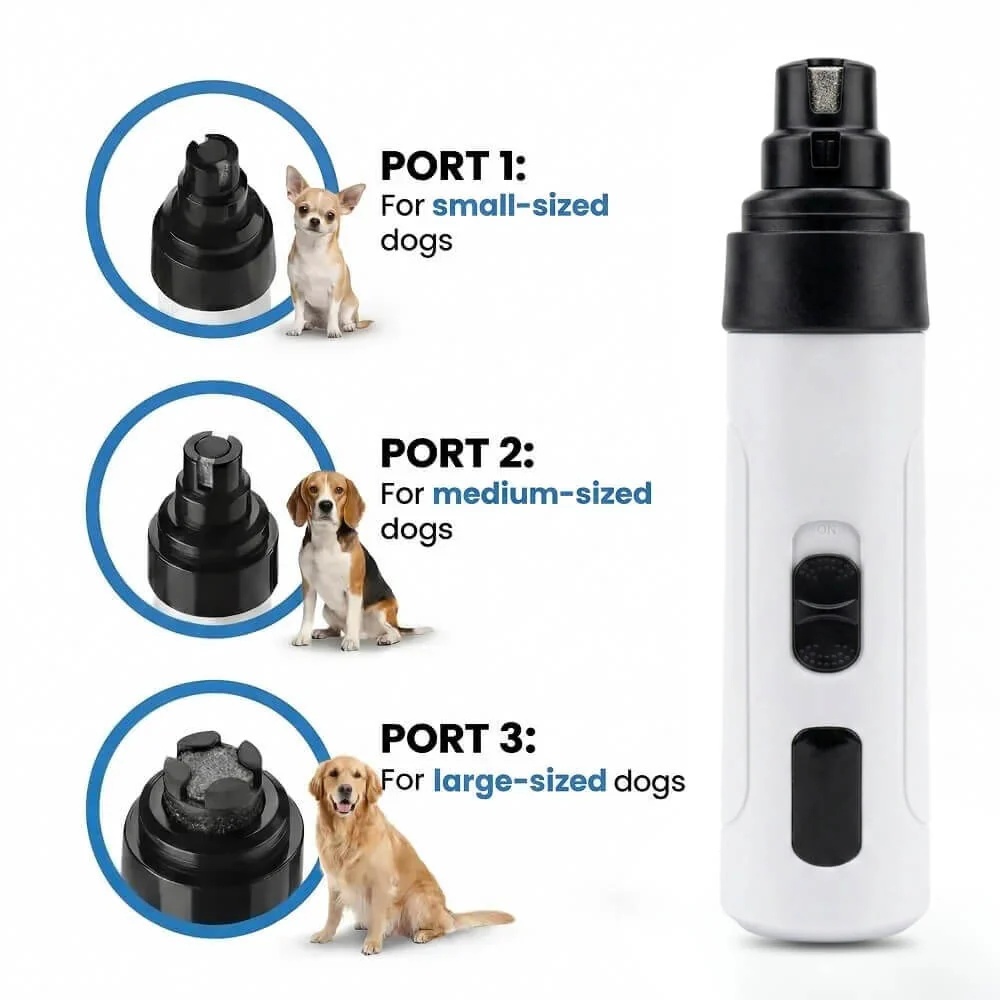
It comes with three distinct port sizes and adjustable speed settings to accommodate toy, medium, and giant breeds.
For giant breeds with thick claws, use the wide-open port on the fast speed setting for efficient filing.
How long does the battery last on a single charge?
Our premium grinder is equipped with a long-lasting lithium-ion battery that provides up to seven hours of continuous run time.
It is fully rechargeable via a convenient USB cable, making it easy to charge using your laptop, wall block, or power bank.
This reliable battery life ensures you never run out of power halfway through a grooming session.
Does the grinding wheel get hot during extended use?
The Zenpaw Maxpro uses advanced, low-heat brass grinding drums to prevent uncomfortable heat buildup.
However, we still recommend applying light, pulsing touches of two to three seconds per claw.
Alternating between claws keeps the nail beds completely cool, comfortable, and safe for your dog.
How do I clean and maintain the grinding head?
To clean the grinder, simply remove the plastic protective sleeve and gently wipe down the brass wheel with a dry microfiber cloth.
You can use a soft-bristled brush to sweep away any lingering nail dust from the ports after each use.
Regularly cleaning the head ensures your grinder maintains its whisper-quiet performance and files smoothly for years.
Conclusion
Ready to transform nail trimming from a stressful battle into a calm, rewarding bonding experience?
Discover the safety and ease of the whisper-quiet Zenpaw Maxpro 3-in-1 Grinder today.
Call our dedicated support team at 302-307-1000 to get personalized grooming tips or product help.