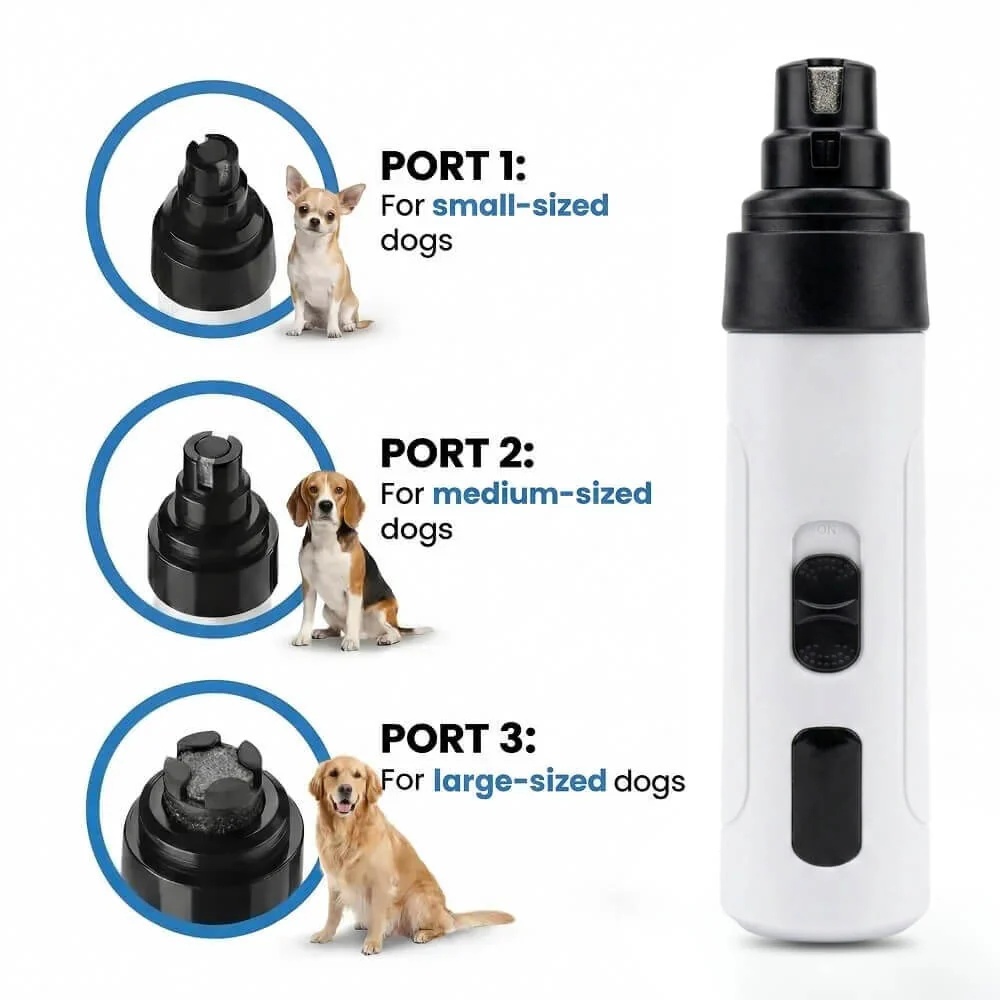
Maxpro 3-in-1 Grinder.
Stress-Free Nail Trimming.
Whisper-quiet DC motor (<40 dB) eliminates fear & discomfort. Features 3 ports, dual speeds, and 7-hour battery life. Safe, precise, and painless.
In This Article
- Step-by-Step Home Guide: Discover the exact procedure to manage, disinfect, and bandage a nail injury safely.
- Canine Nail Anatomy: Deep-dive into the vascular and nervous structure of the quick to prevent future bleeding.
- Expert Desensitization Techniques: Learn how to ease a highly anxious dog into a peaceful grooming routine.
- Clipping vs. Grinding: Compare the structural impact of traditional pressure clippers with whisper-quiet, low-heat grinding.
- Veterinary Checkpoints: Master the critical indicators that signal when a home injury requires professional medical care.
How to Perform Dog Nail Injury Treatment at Home: A Step-by-Step Guide

Managing a claw trauma requires quick reflexes, structured safety measures, and a highly organized toolkit.
Before beginning, compile your emergency first aid supplies so you do not have to leave your dog unattended mid-treatment.
You will need a clean towel, pet-safe antiseptic solution, sterile gauze pads, self-adhesive bandage wrap, and a safe grooming tool to smooth jagged edges.
Step 1: Restrain and Calm Your Injured Dog Safely
An injured dog is in pain and can easily act out defensively due to raw survival instincts.
Always recruit a helper to gently hold the dog and stabilize their head with a reassuring embrace.
Place a soft towel over your dog’s eyes if they show signs of severe panic or hyperventilation.
Speak in a low, soothing tone to keep their heart rate low and minimize sudden movements.
Ensure your physical grip is firm yet compassionate, preventing sudden jerks that could worsen the tear.
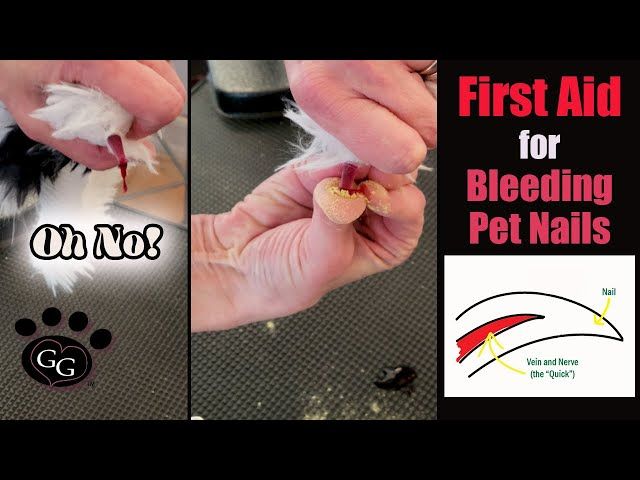
Step 2: Stop the Bleeding Immediately
Apply firm, direct pressure to the bleeding nail using a clean piece of sterile gauze or a clean washcloth.
Maintain this pressure continuously for at least two to three full minutes without lifting the cloth to check.
If bleeding persists, apply professional styptic powder directly to the exposed vascular tissues of the nailbed.
If you find yourself without commercial styptic products during an emergency, you can utilize clean flour to stop dog nail bleeding by packing it firmly around the damaged quick.
Keep the paw elevated if possible to naturally reduce local blood pressure and assist with clotting.
Step 3: Cleanse and Disinfect the Damaged Claw
Once active bleeding ceases, rinse the entire paw gently with lukewarm, clean water to clear away debris.
Dilute a gentle, pet-safe antiseptic solution like chlorhexidine or povidone-iodine to wash the site.
Avoid using harsh rubbing alcohol or hydrogen peroxide because these chemicals destroy healthy cellular structures and cause intense pain.
Pat the area dry carefully with a clean, lint-free cloth, avoiding any aggressive rubbing motions.
Inspect the nail closely to determine if the outer keratin shell is fully split, cracked, or completely detached.
Step 4: Trim Away Loose, Jagged Keratin Edges
Loose hanging pieces of a cracked dog nail will catch on carpets and furniture, causing recurring tears.
If a small portion of the nail shell is dangling loosely, carefully clip it away using a sanitized, sharp clipper.
Avoid cutting into the sensitive pink quick, focusing solely on the detached, dead structure.
For rough, split, or uneven edges that cannot be clipped safely, use a gentle grinder to smooth the surface.
Using the Zenpaw Maxpro Grinder allows you to file down sharp edges safely and smoothly without applying crushing pressure to the painful nail bed.
Step 5: Apply a Protective, Breathable Bandage
Wrap the injured paw in a light layers of sterile non-stick gauze to absorb any minor residual oozing.
Secure the gauze layer with self-adhering veterinary wrap, starting at the toes and wrapping upward past the wrist joint.
Ensure you place soft cotton padding between your dog’s toes to prevent moisture buildup and painful friction chafing.
Never pull the bandage tight, as this can easily cut off vital circulation and cause severe tissue damage.
Check the bandage frequently throughout the day to verify it remains dry, clean, and comfortably positioned.
By establishing a calm environment and maintaining an organized first-aid routine, you can safely administer dog nail injury treatment at home.
To ensure your maintenance work is completely painless and free from structural cracking, we highly recommend upgrading to the Zenpaw Maxpro 3-in-1 Grinder, which features a whisper-quiet motor and a durable diamond bit.
99-Day 100% Money-Back Guarantee
“Ever since we started using the Zenpaw Maxpro Grinder, it’s been such a peaceful experience. It’s very quiet, and my dog actually relaxes. It’s turned our stressful sessions into quick, quiet grooming times.”
— Sarah M. | ✔ Verified Customer
- ✓ Prevents Infection & Splitting
- ✓ Ideal for All Dog Sizes
- ✓ Low-Vibration Technology
- ✓ Fast 2-7 Days Delivery
Need Support? Call 302-307-1000
Understanding Canine Nail Anatomy: The Quick and Trauma Mechanics
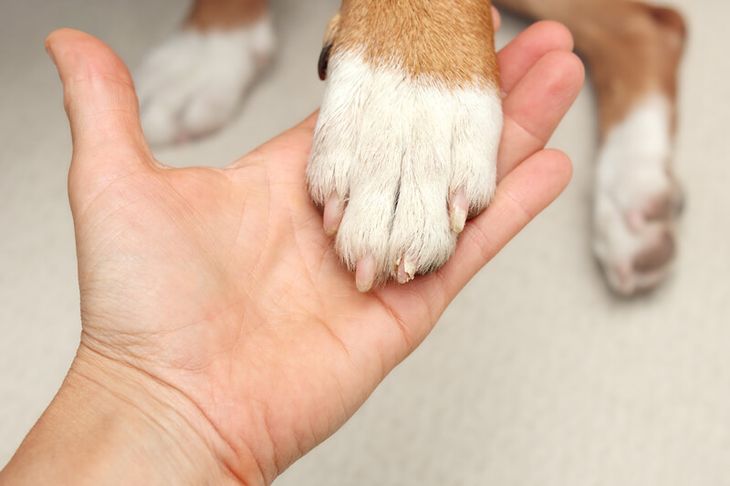
Canine claws differ fundamentally from human nails in both structural thickness and physiological complexity.
The core of every dog nail houses the quick, a highly vascular, living tissue containing blood vessels and nerve endings.
This biological makeup explains why a broken dog nail treatment requires immediate, careful attention to manage both pain and bleeding.
When the hard, protective outer keratin sheath breaks, these sensitive nerve fibers are exposed directly to the air.
This exposure causes intense pain and creates a direct pathway for bacteria to enter the body.
The Core Vascular Structure: Why Nail Injuries Bleed So Heavily
The blood vessels within the quick are branches of the digital arteries, which carry high pressure.
Even minor damage to this area will lead to surprisingly heavy bleeding that can easily startle pet parents.
In dark or black dog nails, finding the boundary of the quick is difficult because the pigment conceals the inner blood supply.
Using improper tools or dull clippers can crush the entire nail shell, leading to microscopic fractures that compromise structural integrity.
To avoid these issues, many professional groomers suggest checking reviews for the best dog nail clippers with quick sensor reviews or using high-performance grinders instead.
Grinding allows you to file down the nail gradually, helping you spot the safe visual dry point before you reach the quick.
Bacterial Infection Risks in Open Claw Wounds
An open nail injury is highly vulnerable to local infections, which can easily progress to deep tissue complications.
Dogs walk on varied ground surfaces, bringing their exposed wounds into contact with many types of bacteria.
If a bacterial infection reaches the bone, it can lead to osteomyelitis, which is a complex condition to treat.
Look out for swelling in the toe, a warm feel to the paw, persistent limping, or clear discharge.
Keeping the area clean and bandaged during the first twenty-four hours is crucial to protect the wound.
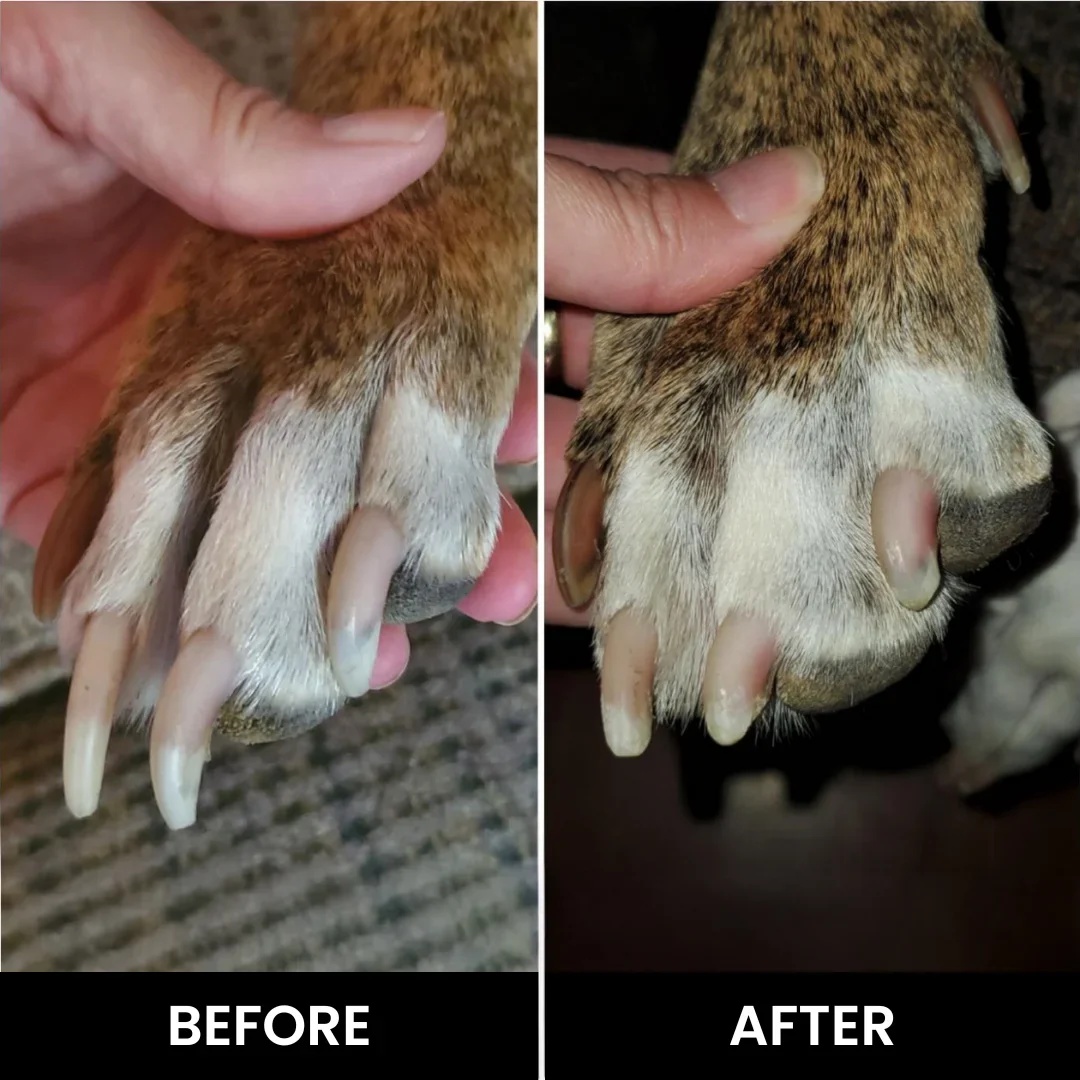
The Physics of Grooming: Clipping Pressure vs. Grinding Action
Traditional nail trimming tools rely on shear force, compressing the hard outer shell until it cuts through.
If your dog’s nails are dry, thick, or brittle, this intense pressure can easily cause the keratin to crack.
These cracks often run vertically up the nail, potentially reaching all the way to the sensitive quick.
This cracking is one of the main reasons dogs develop a fear of nail trims and show behavioral resistance.
In contrast, a high-speed rotating diamond bit works by gently filing down the nail material.
This gradual filing removes the risk of sudden cracks and allows you to shape the claw with precision.
By using a low-vibration, high-torque rotary tool, you can shape the nail smoothly and gradually.
The whisper-quiet operation of our Zenpaw Maxpro tool prevents the sudden sound-based panic that often leads to grooming injuries.
This systematic, stress-free approach helps turn a stressful chore into a peaceful, routine bonding experience.
The Psychology of Paw Desensitization for Anxious Dogs
Building a cooperative routine with an anxious pet requires patience, consistency, and a step-by-step training approach.
Many dogs develop strong protective behaviors around their paws because they are sensitive to touch.
If your dog tries to bite when cutting nails, it is a clear sign they are feeling overwhelmed and fearful.
In some cases, a highly stressed dog may exhibit dramatic avoidance responses, or even act like a dog pretends to faint having nails cut to escape the situation.
For pets with extreme grooming anxiety, you should consult your veterinarian to discuss options, including an appropriate trazodone dosage for dogs nail trim to help keep them calm.
Step-by-Step Training Guide to Desensitize Your Dog to the Grinder
Begin by letting your dog see the tool while it is turned off, pairing its presence with high-value treats.
Once they are comfortable, turn the grinder on at a distance so they can adjust to the sound without pressure.
Slowly bring the running tool closer, rewarding them continuously for remaining calm.
Gently touch the handle of the running grinder to their leg so they feel the mild, soothing vibration.
Work your way down to the paw, making sure to keep every session short, positive, and stress-free.
How to Hold and Angle the Grinder for Safe Filing
Stabilize your dog’s toe firmly but gently, separating it from the surrounding fur.
Hold the grinder at a steady 45-degree angle relative to the natural growth slope of the claw.
Apply the diamond rotating head to the nail using short, gentle touches lasting only one to two seconds.
This pulsing method prevents heat buildup, ensuring the sensitive quick stays cool and comfortable.
Always file the outer edges inward to create a smooth, rounded finish that won’t catch on fabrics.
Critical Mistakes to Avoid in Home First Aid and Grooming
One of the most common mistakes is trying to clean a fresh wound with harsh, stinging disinfectants.
Chemicals like hydrogen peroxide can actually delay healing by irritating delicate cellular structures.
Another common issue is wrapping a bandage too tightly, which can restrict healthy circulation.
Make sure to check the wrap frequently to ensure it remains dry and comfortable.
Using dull clippers can also crush and split the nail, creating painful cracks in the keratin.
A high-quality grinder allows for gradual, precise filing, helping you avoid these common issues entirely.
Home Treatment vs. Professional Veterinary Intervention
Use this guide to help you decide when a dog nail injury can be treated at home and when it requires a veterinary visit.
| Symptom Severity | Home Care Strategy | Veterinary Action Plan |
|---|---|---|
| Minor Split / Chip (No blood) | File smooth with Zenpaw Grinder to prevent further tearing. | Not required unless the split extends deep into the hair line. |
| Exposed Quick (Bleeding stopped) | Cleanse with antiseptic, apply styptic powder, and wrap gently. | Schedule a visit if pain persists beyond 24 hours. |
| Active Bleeding (Over 10 mins) | Apply firm pressure, use styptic powder or flour, and wrap. | Seek immediate care if bleeding continues despite pressure. |
| Infection Signs (Swelling, pus) | Clean gently and keep dry. Do not apply tight wraps. | Requires prescription antibiotics and professional evaluation. |
Frequently Asked Questions About Dog Nail Injuries
Conclusion: Your Stress-Free Grooming Journey Starts Here
Mastering home nail care can transform a stressful grooming chore into a peaceful, routine bonding experience.
Ready to transform nail trimming from a battle into a breeze? Explore the Zenpaw Maxpro 3-in-1 Grinder. Call: 302-307-1000 — our team can help you advise on the best grooming practices and help with any product questions.