I still remember the absolute dread in my golden retriever’s eyes every time I pulled out those heavy metal nail clippers, a paralyzing fear that only grew after I accidentally nicked his sensitive quick and left us both covered in blood and tears. If you are struggling to discover how to get a dog used to a nail grinder without turning your living room into a high-stress battleground, please know that you are not alone and that a gentle, painless path to perfectly smooth claws is completely within reach. By moving away from aggressive, crushing traditional tools and embracing a whisper-quiet, low-vibration electric file, you can easily restore trust, eliminate grooming anxiety, and protect your beloved companion’s sensitive paws forever.
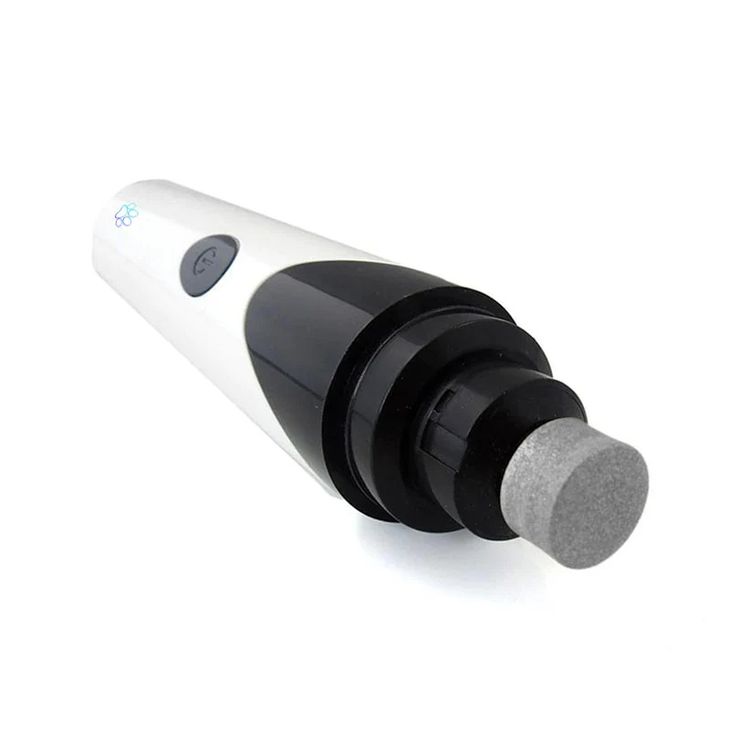
Maxpro 3-in-1 Grinder.
Stress-Free Nail Trimming.
Whisper-quiet DC motor (<40 dB) eliminates fear & discomfort. Features 3 ports, dual speeds, and 7-hour battery life. Safe, precise, and painless.
In This Article
- Step-by-Step Desensitization: Learn the exact blueprint to transform grooming fear into peaceful bonding.
- Canine Nail Anatomy: Master the secrets of locating the quick on both light and dark nails safely.
- Expert Trimming Angles: Discover why a precise 45-degree angle prevents cracking and splits.
- Common Pitfalls to Avoid: Find out why standard clippers crush claws and how to prevent heat buildup.
How to Get a Dog Used to a Nail Grinder: A Step-by-Step Training Guide
Before you begin the physical training process, you must gather the proper supplies and prepare a peaceful environment.
You will need high-value treats such as freeze-dried liver, a quiet room free of distractions, and a premium rotary tool designed specifically for pets.
Using a loud, generic household tool will only startle your dog and set your progress back by several weeks.
Patience is your absolute most valuable resource during this training journey.
-
Step 1: Introduce the Unpowered Grinder
Place the silent, turned-off nail grinder on the floor near your dog.
Let your dog investigate, sniff, and touch the device at their own natural pace.
Deliver a delicious, high-value treat every single time your dog shows curiosity or makes physical contact with the tool.
This simple exercise builds a powerful positive association before any sound or vibration is ever introduced.
Repeat this introductory step three to five times a day for at least two consecutive days.
-
Step 2: Introduce the Sound of the Motor
Hold the grinder several feet away from your pet and turn the motor on to its lowest speed setting.
Immediately feed your dog a stream of continuous, highly appetizing treats while the motor runs quietly in the distance.
Turn the tool off and instantly stop feeding the treats to show them that the sound brings rewards.
This classical conditioning technique teaches your dog that the soft hum of the motor is the ultimate signal for snack time.
Gradually bring the running tool closer over multiple sessions, always monitoring your dog’s comfort levels.
-
Step 3: Touch the Paw with the Vibrating Handle
Turn the grinder on and place the vibrating plastic casing—never the abrasive stone—against your dog’s leg.
Keep the vibrating handle in gentle contact with the outer leg or shoulder for just three seconds.
Shower your dog with verbal praise and reward them with their absolute favorite treat immediately after contact.
Slowly work your way down the leg until you can touch the top of the paw without any pulling away.
This crucial step helps desensitize your dog to the physical sensations of the tool’s motor vibration.
-
Step 4: Execute a Brief Single-Second Tap
Gently isolate one single claw with your fingers while holding the running grinder in your opposite hand.
Touch the rotating grinding wheel to the very tip of the nail for no more than one brief second.
Pull the tool away immediately and celebrate with a jackpot of high-value treats and enthusiastic physical affection.
Do not attempt to fully trim or shape the nail during this introductory touch session.
You are simply teaching your pet that the physical sensation of grinding on the claw is completely painless.
-
Step 5: File One Single Nail Completely
Once your dog accepts the single-second tap, you can proceed to shape a single claw.
Hold the grinder at a steady angle and apply light, pulsing pressure to the nail tip.
Work in short increments of two to three seconds to prevent any heat from building up on the sensitive nailbed.
Provide a high-value treat after finishing that single nail, and then end the grooming session immediately.
It is far better to trim one nail successfully per day than to overwhelm your dog by rushing all four paws.
-
Step 6: Progress Gently to Full Paw Sessions
Slowly increase the number of claws you groom during each individual session over the next two weeks.
Always maintain a relaxed, calm energy and keep your sessions under five highly positive minutes.
If your pet shows any signs of distress or tries to pull away, stop immediately and return to the previous step.
Ending a grooming session on a successful note is the key to long-term behavioral success.
To support your companion through this developmental journey, our team at Zenpaw created the perfect training partner.
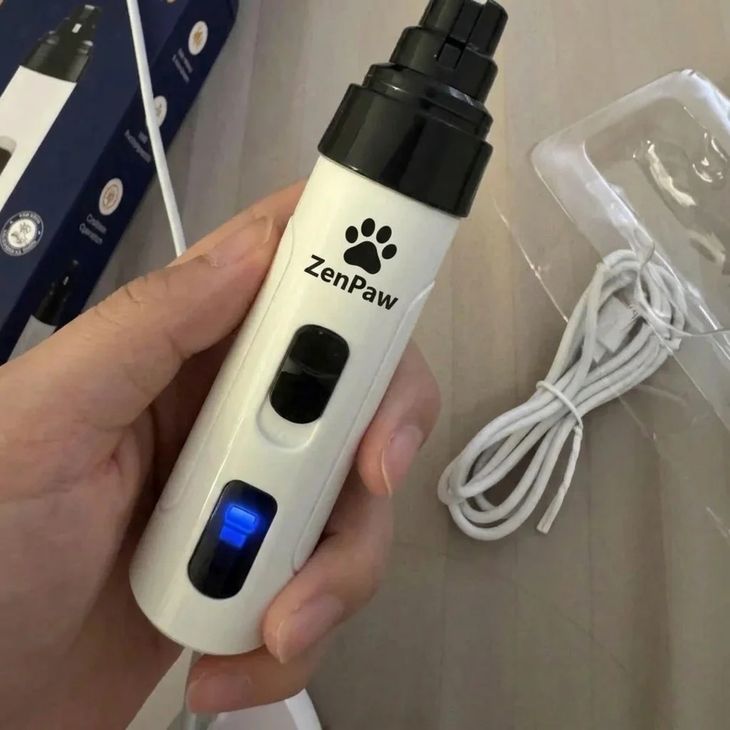
You can seamlessly elevate your training routine by using the whisper-quiet, ultra-low vibration technology of the Zenpaw Maxpro 3-in-1 Grinder, designed to make home nail care completely stress-free for both you and your beloved pet.
99-Day 100% Money-Back Guarantee
“Ever since we started using the Zenpaw Maxpro Grinder, it’s been such a peaceful experience. It’s very quiet, and my dog actually relaxes. It’s turned our stressful sessions into quick, quiet grooming times.”
— Sarah M. | ✔ Verified Customer
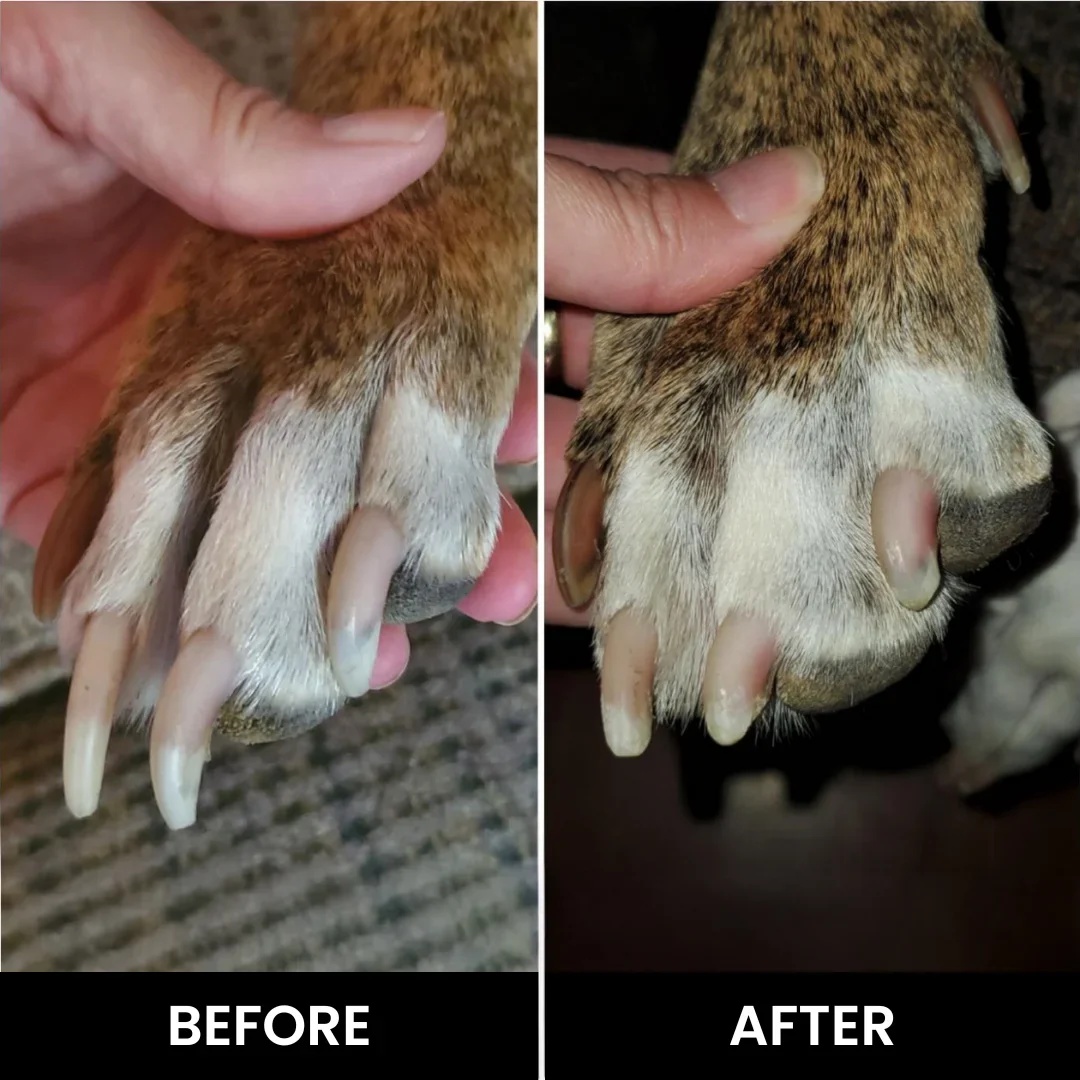
- ✓ Prevents Infection & Splitting
- ✓ Ideal for All Dog Sizes
- ✓ Low-Vibration Technology
- ✓ Fast 2-7 Days Delivery
Need Support? Call 302-307-1000
Understanding the Science of Canine Nail Care
To groom your dog successfully, you must first understand the biological makeup of their claws.
Canine claws are complex, living structures that require regular, precise maintenance to prevent structural damage.
Unlike human nails, which are flat and dead, a dog’s claw contains a highly sensitive inner core known as the quick.
The quick is packed with active blood vessels and hypersensitive nerve endings that trigger intense pain if they are damaged.
When you use traditional clippers, they exert massive, crushing pressure on this delicate area before they even make a cut.
This pressure can cause microscopic fractures along the outer keratin shell of the claw.
Over time, these micro-fractures can split, allowing dirt and harmful bacteria to enter the inner nailbed.
Understanding the internal anatomy of the claw helps pet parents make informed decisions about grooming safety.
By learning what is the spot to cut a dogs nail, you can easily protect the nerve endings and avoid painful accidents.
Deciding Between Clippers and Rotary Files
Many pet owners wonder which tool is truly best for their dog’s long-term wellness.
When analyzing cutting vs grinding dog nails, professional groomers consistently praise rotary tools for their safety and precision.
Traditional clippers cut through the claw in one swift, aggressive motion that leaves sharp, jagged edges behind.
These sharp edges can catch on household carpets, pulling on the toe joints and causing painful snags.
A high-quality rotary file acts like a fine sander, slowly removing paper-thin layers of the claw with complete control.
This gradual filing method allows you to stop the moment you see the early warning signs of the sensitive quick.
It also rounds the edges of the claw perfectly, leaving behind a smooth, polished finish that protects your hardwood floors.
How to Safely Groom Dark Claws
Grooming dark or black dog nails is often considered one of the most stressful tasks in pet ownership.
Because the dark pigment completely hides the pink quick, traditional clipping becomes a risky guessing game.
Using a rotary file completely eliminates this dangerous guesswork by allowing you to work in small, controlled increments.
As you file a dark claw down, you must inspect the center of the cut surface after every few pulses.
You will initially see a dry, chalky white powder across the entire grinding surface of the nail.
As you get closer to the quick, the center of the nail will gradually transition to a moist, dark grey spot.
Stop filing immediately when you see this dark circular spot appear in the center of the claw.
This visual indicator tells you that you have safely reached the outer boundary of the living nerve tissue.
Practical Introduction and Behavioral Conditioning
If your dog is afraid of nail grinder noises or resists having their paws touched, you must use systematic desensitization.
Desensitization is a science-backed method that slowly replaces a dog’s fear with feelings of safety and relaxation.
Never force or pin your dog down, as this will trigger their natural fight-or-flight response and destroy their trust.
If your dog becomes too stressed to continue, you can temporarily use a diy dog nail file board to keep their nails short while you work on sound training.
This alternative tool lets your dog actively file their own front nails through positive scratch-board play.
For larger, highly anxious breeds, using a comfortable large dog sling for nail trimming can provide secure, calming support during your training sessions.
By gently lifting your pet off the ground, a grooming sling reduces struggle and allows you to focus on precise nail care.
Mastering the Perfect 45-Degree Angle
To achieve professional grooming results, you must hold the rotary tool at a precise 45-degree angle to the claw.
This angle matches the natural slope of your dog’s foot as they walk, promoting healthy posture and comfortable joint alignment.
Never hold the rotating wheel flat against the tip of the claw, as this can cause uncomfortable vibrations.
Instead, use smooth, sweeping motions around the top and sides of the nail to create a gently rounded dome shape.
Support your dog’s toe firmly but gently with your thumb to stabilize the claw and minimize vibration.
By keeping the claw stable, you ensure that the filing process remains completely silent and comfortable.
The Danger of Heat Buildup on Sensitive Claws
One of the most common mistakes beginners make is holding the grinding stone on a single nail for too long.
Friction naturally creates heat, and this heat can quickly transfer through the nail to the sensitive nerve endings below.
If your dog suddenly flinches during a session, they are likely reacting to a hot nail rather than physical pain.
To avoid this, use a simple “touch-and-go” technique by moving between different nails constantly.
Grind a single claw for no more than two seconds before moving directly to the next nail on the paw.
This rotating pattern gives each claw plenty of time to cool down completely, ensuring a pain-free experience.
The Zenpaw Maxpro features specialized low-heat technology to help prevent this heat buildup and keep your pet comfortable.
Common Risks and How to Overcome Them
Rushing through the training process is the absolute number one reason why a dog hates nail grinder tools.
Many pet owners expect to trim all twenty claws on their very first day of training.
This unrealistic expectation leads to intense pressure, stressful struggles, and long-term behavioral issues.
If your dog pulls their paw away, simply release it calmly without scolding them or showing frustration.
Always reward your pet for small victories, such as letting you hold their paw for just five seconds.
If you make a mistake and nick the quick, do not panic or show fear to your dog.
Simply apply styptic powder or cornstarch to the nail tip with firm pressure to stop the bleeding quickly.
Give your dog a high-value treat immediately to turn the accident into a positive learning experience.
Frequently Asked Questions
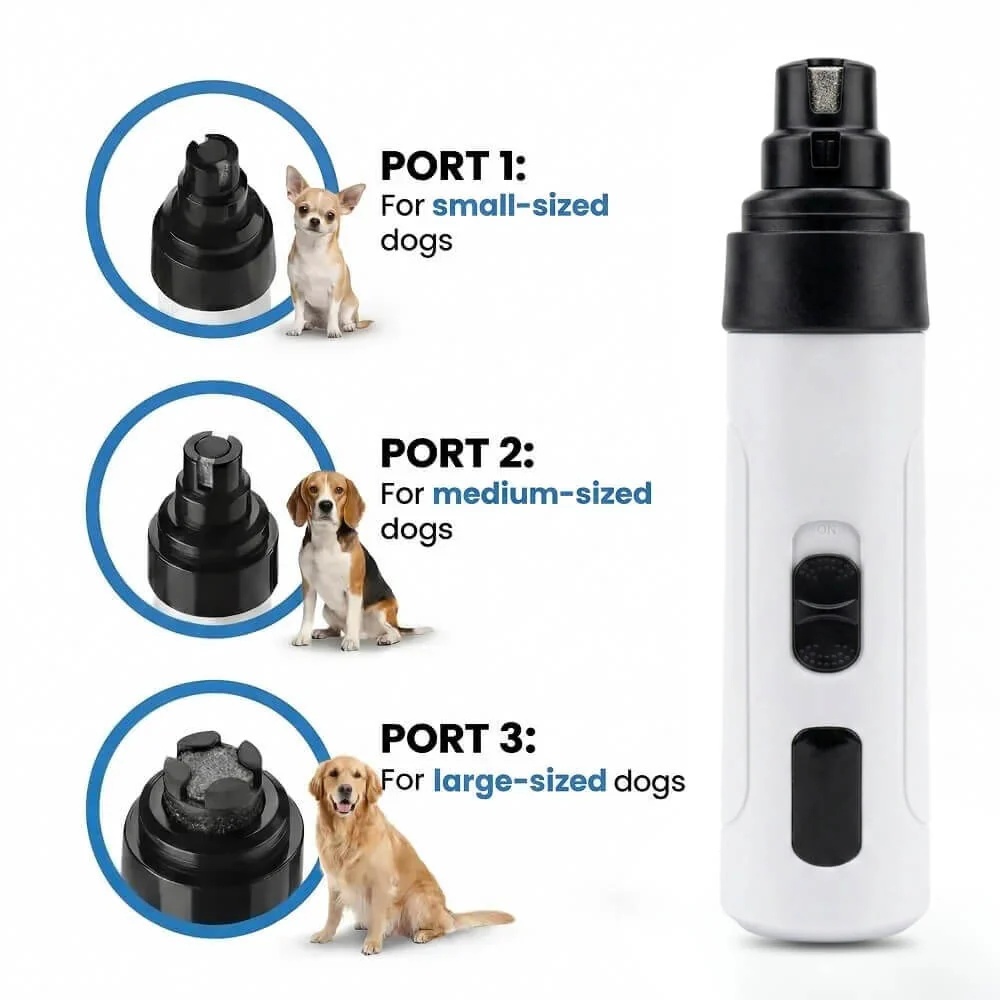
Is the Zenpaw Grinder safe for large dog breeds?
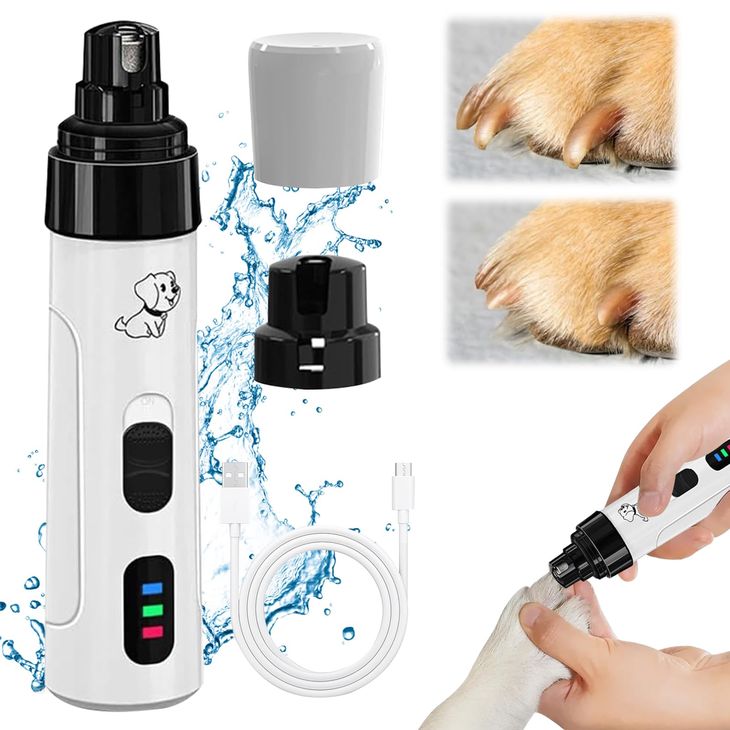
Yes, the Zenpaw Maxpro features three specialized grooming ports designed to accommodate small, medium, and large dog breeds safely.
The heavy-duty brass core motor delivers strong, steady rotational power that can easily handle the thickest claws.
Simply choose the wide-opening port or remove the protective cover completely to easily groom larger dog nails.
How long does the battery last on a single charge?
The Zenpaw Maxpro features a premium, long-lasting lithium-ion battery that provides up to 7 hours of continuous use on a single charge.
It is fully USB rechargeable, allowing you to charge the tool easily using your computer, phone charger, or car USB port.
This long battery life means you can complete multiple grooming sessions without ever worrying about losing power mid-trim.
Which motor speed should I use for my anxious dog?
We recommend starting your training sessions on our lowest speed setting, which runs at a whisper-quiet volume under 40 decibels.
This ultra-quiet speed minimizes sound and vibration, making it perfect for introducing sensitive or anxious dogs to the tool.
Once your dog is completely comfortable, you can switch to the high-speed setting to easily shape thicker claws.
Does the grinding stone get hot during use?
The Zenpaw Maxpro is engineered with advanced low-heat diamond drum technology that minimizes friction and heat buildup during use.
However, we still recommend working in short, pulsing intervals of two to three seconds per claw to ensure your pet remains perfectly cool.
If you prefer professional help during the initial training phase, you can research in home dog nail trimming near me to find local groomers who use gentle, positive reinforcement methods.
Transform Your Dog’s Grooming Routine Today
Ready to transform nail trimming from a stressful battle into a peaceful bonding breeze?
Explore the premium, veterinarian-approved Zenpaw Maxpro 3-in-1 Grinder completely risk-free today.
Call our support team at 302-307-1000 for expert advice on the best home grooming practices for your companion.